How to Auto-Generate a Barcode in Excel [Tutorial]

There’s nothing more versatile than a spreadsheet. From managing your business’s finances to scheduling the content you’ll use on your blog, spreadsheets can do it all. But did you know that you can use your Excel spreadsheet to generate barcodes?
This makes it ideal for inventory management and your budget. So without further ado, it’s time to show you how to auto-generate a barcode in Excel!
Auto-Generating a Barcode in Excel
Your graphic designer was right - fonts do matter.

Before diving into Excel, we’ll need to find a font that we can use to generate our barcode. There are several of these fonts available online, and the one you use will depend on what you want to use your barcodes for.
In this example, though, we’ll use the 3 of 9 barcode font that you can download here.
Once we’ve downloaded the font, we’ll install it on our system to make it visible in Excel.
Step 1: Set Up Your Spreadsheet to Auto-Generate Barcodes in Excel
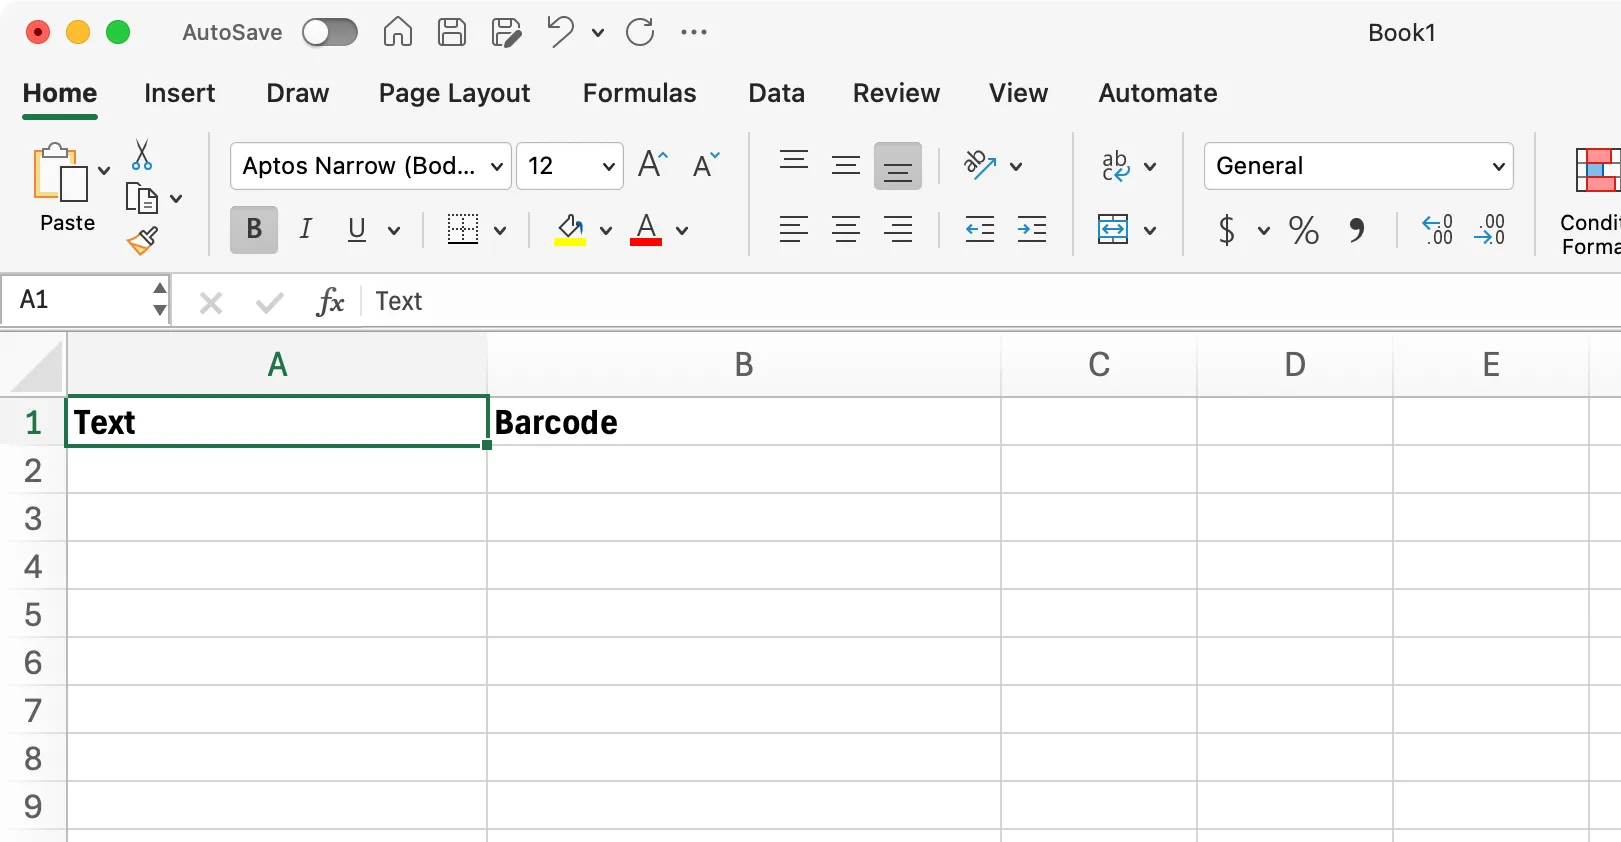
We’ll open a new Excel workbook and create two columns, one for Text and the other for Barcode.
You can create as many columns as you need to add descriptions and other information to every row.
Step 2: Formatting the Text Column
We’ll need to format the cells in the Text column to make sure we keep any leading zeros in our numbers. This formatting also prevents large numbers from displaying in scientific notation.
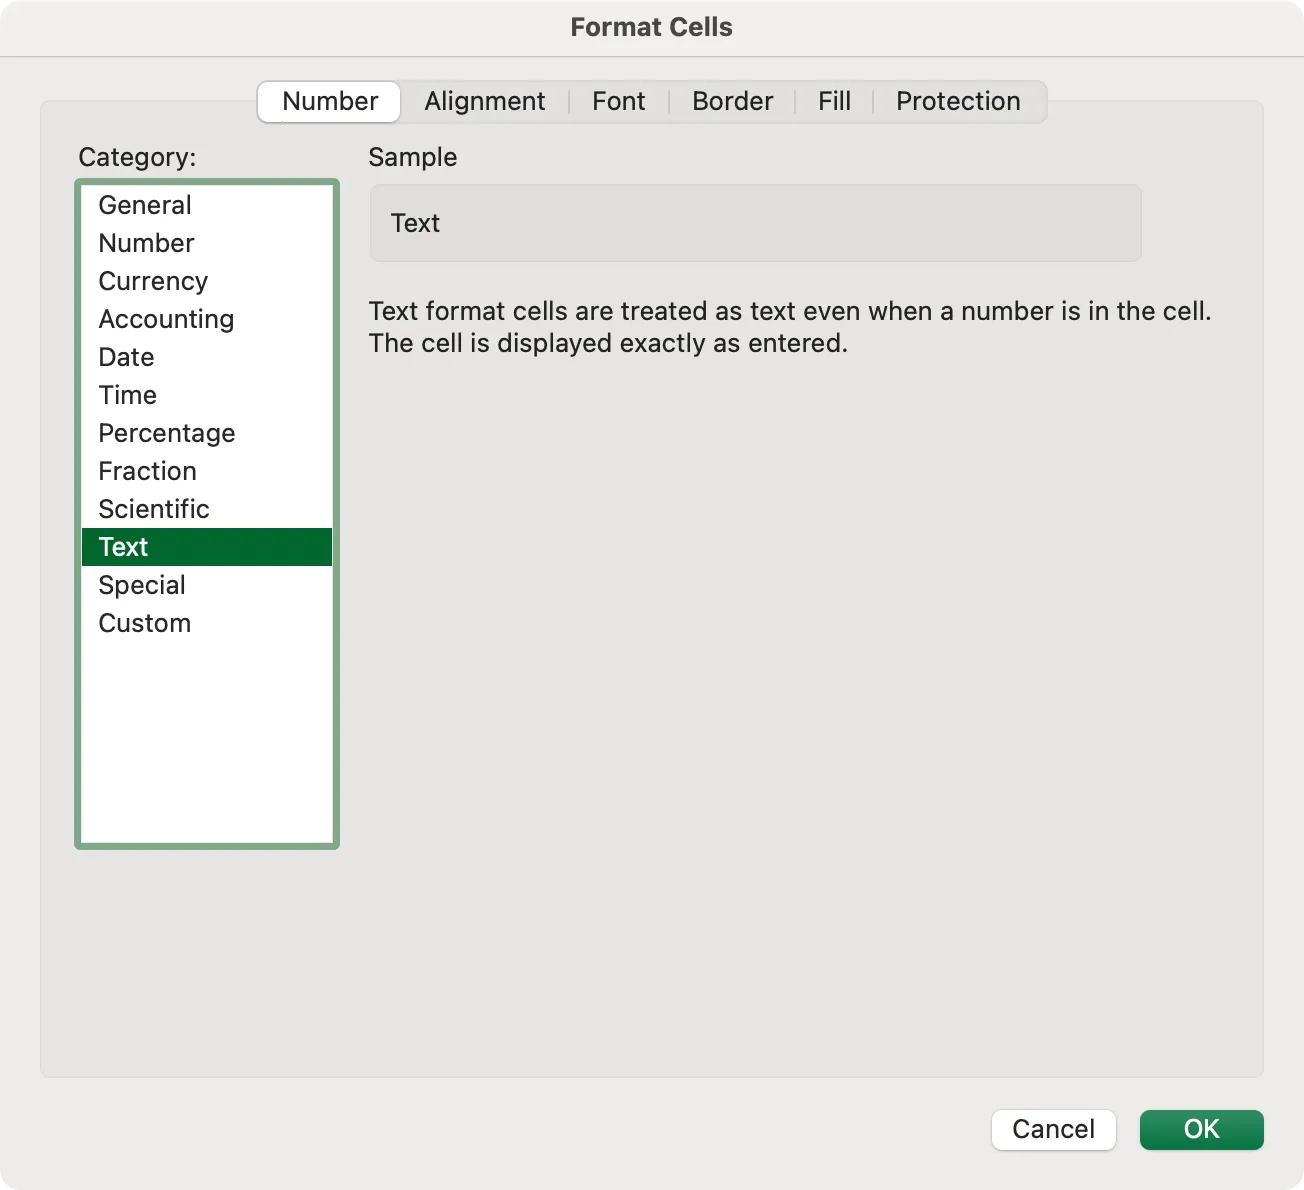
To format the Text column, we’ll select it in the top bar, right-click, and select Format Cells.
In the dialog box that opens, we’ll select Number in the top bar and Text as our Category.
Step 3: Creating Your Formulas
With our Text column formatted, we’ll also need to input the formula that will copy the information from our Text column over to our Barcode column.
Here, we’ll use ="*"&A2&"*" as our formula.
(We’re using A2 in our formula because we used the A column as our Text column. So, your mileage may vary.)
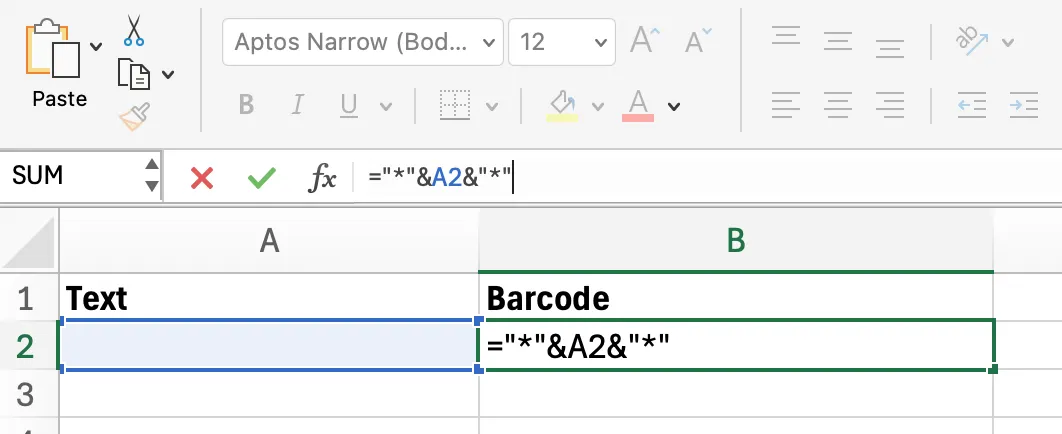
Once we’ve entered the formula, our cell will now display **.

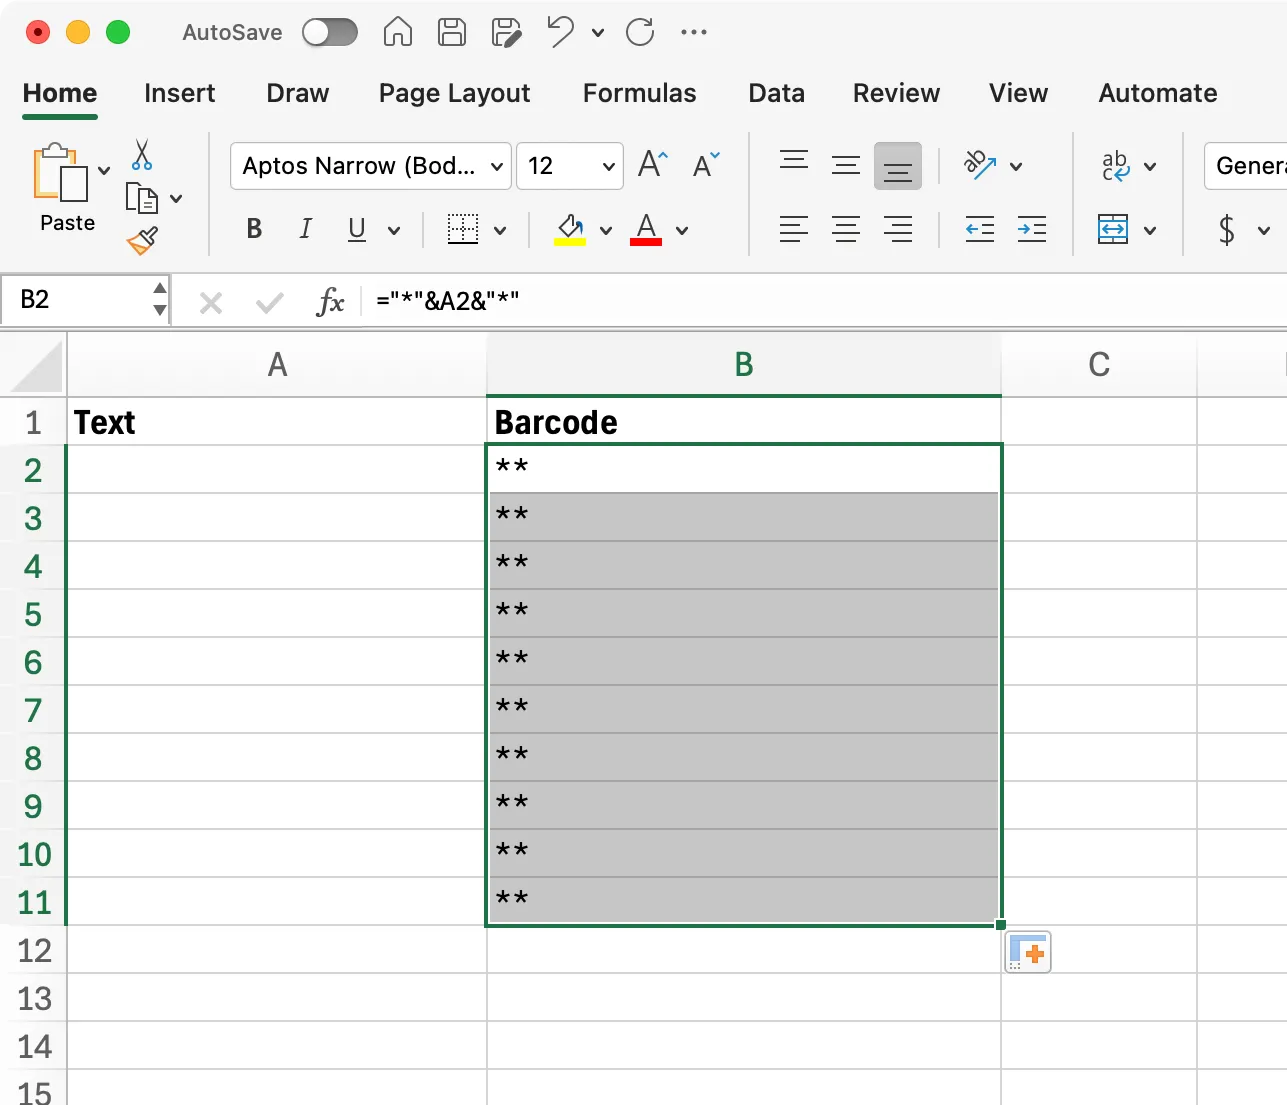
We can now select the bottom-right of the cell and drag it down to copy our formula to the cells below.
Step 4: How to Auto-Generate Your Barcodes in Excel
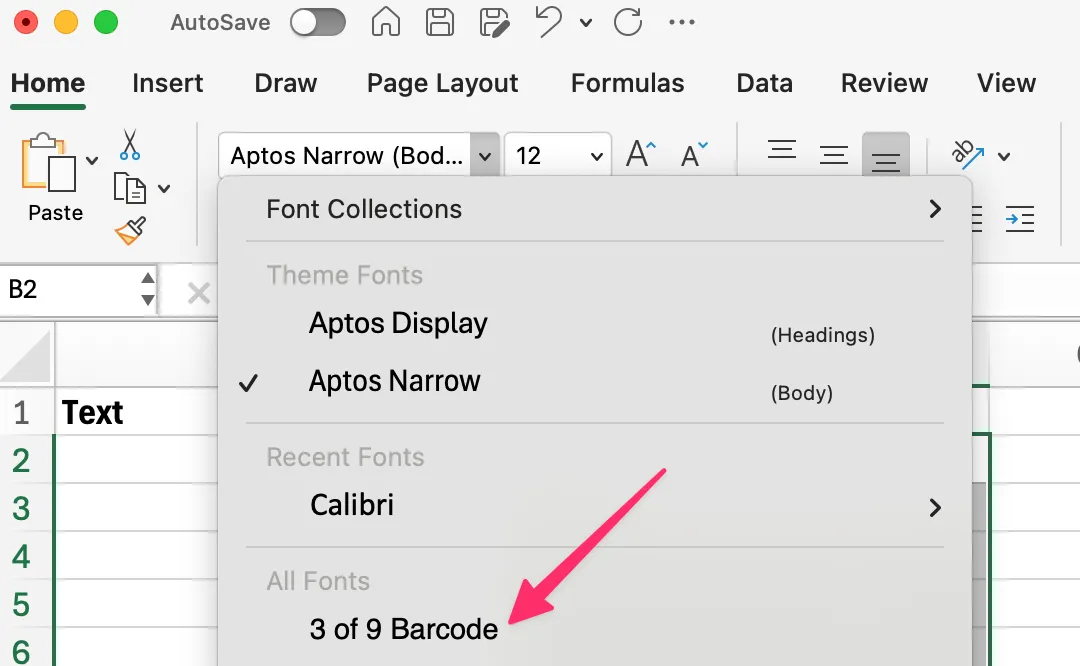
Once we’ve copied the formula to a few cells below, we can select all these cells and change the font to the 3 of 9 Barcode font we downloaded and installed earlier. This will then show a barcode in every cell.
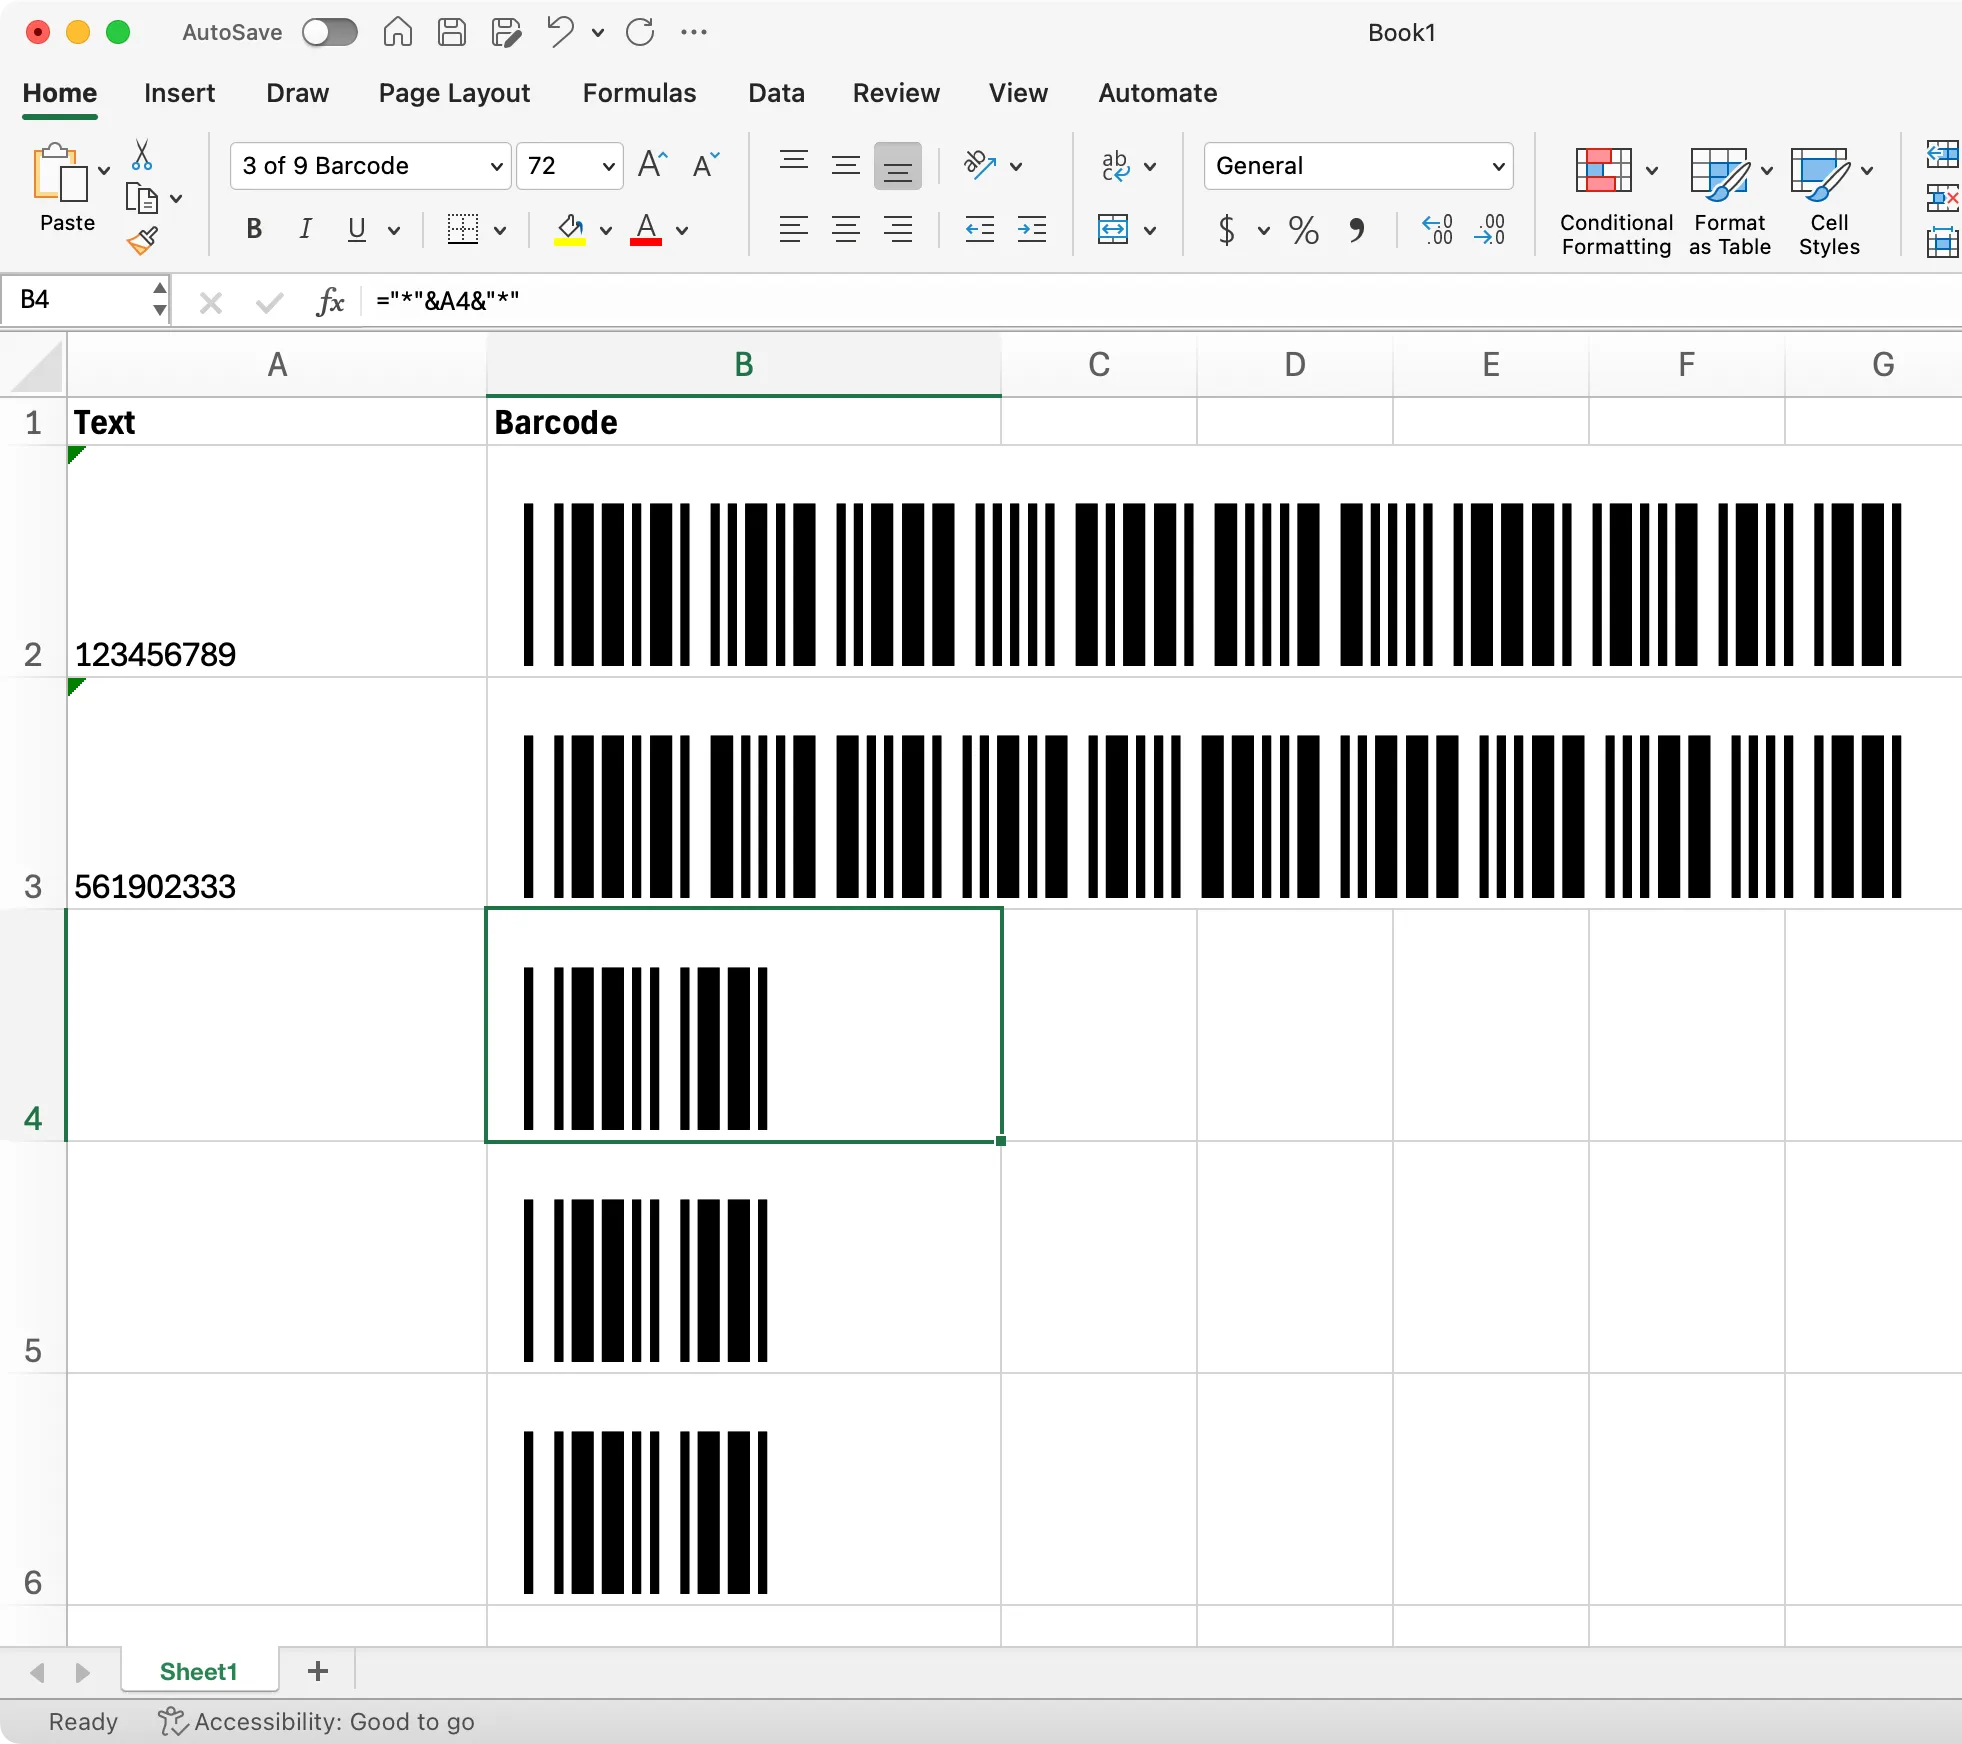
With the font changed, we can now enter numbers or text into our Text column.
As we enter the information, the Barcode column will automatically display its barcode.
Other Options for Generating Barcodes in Excel
Even though this method works, it still requires a fair amount of manual work before you can generate barcodes.
You can use the RANDBETWEEN function to eliminate some of the manual work. This function generates a random number between two numbers. This is the ideal option if, for instance, you need to generate many SKUs.
Another option would be to use one of the many available Office Add-ins that can generate barcodes for you from Excel data.
Make Your Spreadsheets Work for You
Once you’ve created your data in your spreadsheet, you can get the most value from it by using Sheet Best. Our platform allows you to turn your spreadsheets into REST APIs in a matter of seconds.

You’ll be able to use your spreadsheets everywhere, from mobile apps to your own custom inventory management system.
To try Sheet Best out for yourself and see what difference it can make in your business, get started for free today!