Create a Feedback Form using Google Sheets

Google Sheets™ is an excellent tool for quickly storing information. It is particularly useful for collecting user feedback, like tickets, issues, or even feature requests, without requiring a traditional database like PostgreSQL or MySQL.
With Sheet Best, you can collect form submissions effortlessly and store them directly in Google Sheets without dealing with complex APIs. If you use the Sheet Best JavaScript Library, you can even do it in a single line of code.
In this guide, we’ll walk you through setting up your Google Sheet, configuring Sheet Best, and creating a fully styled feedback form.
Note: This post is the first in a series that explores the Sheet Best template library. Stay tuned for more tutorials and use-cases! Check out other templates in the Blog or directly in the template library.
Step 1: Prepare Your Google Sheet
Before building the form, we need a Google Sheet to store the submitted data.
- Create a Google Sheet: Open Google Sheets and create a new sheet.
- Add columns: Define the columns for your form data (e.g., Name, Topic, Feedback).
- Set up Sheet Best:
- Sign up at Sheet Best and create an account.
- Add your Google Sheet to Sheet Best by following the setup instructions.
- Save the Sheet Best connection URL (this will be used in your form).
The connection URL can be used for RESTful requests (i.e., GET, POST) and should look something like this:
https://api.sheetbest.com/sheets/11d6386b-2d0e-406f-8bd3-ef708a3dc780Step 2: Write the Form
Now, let’s create a simple HTML form that submits data to Google Sheets using Sheet Best. Let’s set up a basic form that has a field for each column in the sheet:
Basic HTML Form
<form data-sheet-best="YOUR_SHEET_BEST_CONNECTION_ID">
  <label>Name: <input type="text" name="Name" required></label><br>
  <label>Topic: <input type="text" name="Topic" required></label><br>
  <label>Feedback: <textarea name="Feedback" required></textarea></label><br>
  <button type="submit">Submit</button>
</form>
The columns in your Google Sheet will correspond to the field names in your form and are case-sensitive, so make sure they match exactly.
Leverage the Sheet Best JS Library
To handle the form submission without having to write any code, we use the Sheet Best JS template library:
<script src="https://cdn.sheet.best/sheet-best-templates.js"></script>Once you add the script, the form should be working. Just go ahead and submit your first entry, and you should see a row appear on your spreadsheet.

Now just add some JS magic to display a feedback message whenever the form is submitted. To do that, we listen to the submission event provided by the Sheet Best library:
<script>
  document.addEventListener('DOMContentLoaded', () => {
    document.querySelectorAll('form[data-sheet-best]').forEach(form => {
      form.addEventListener('submit-finished', (event) => {
        alert('Feedback submitted successfully!');
        form.reset();
      });
    });
  });
</script>
In the above code, we generate an alert message and reset the form to get it ready for a new submission. Alternatively, you can disable the form, display a success message, or customize the output to fit your specific use case.
Step 3: Style the Form
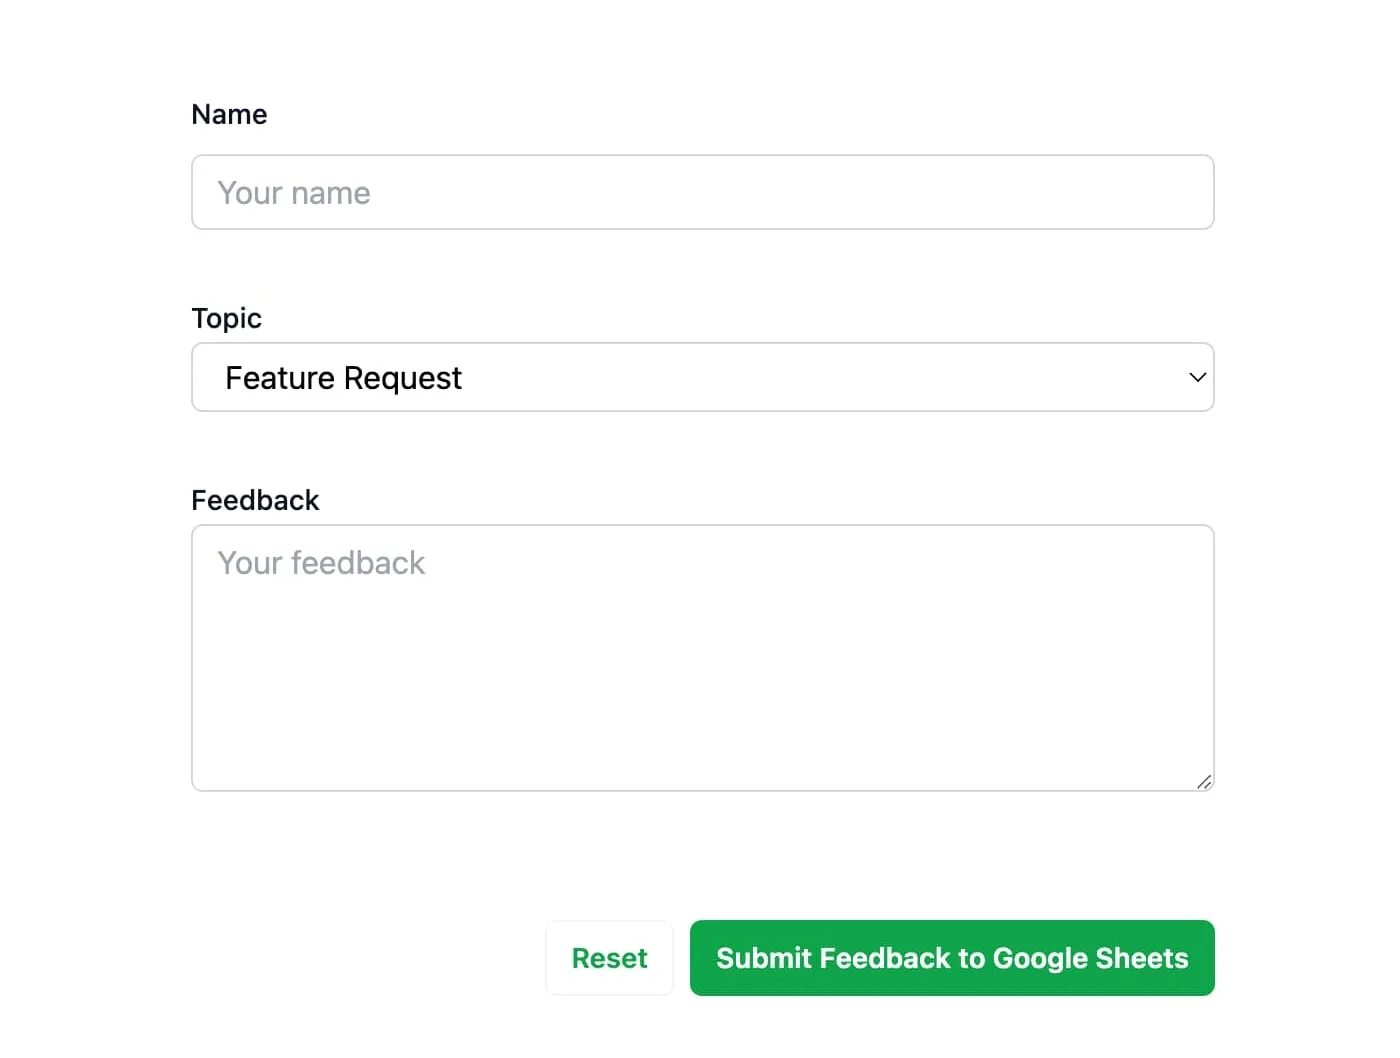
For a professional look, we apply some Tailwind CSS classes and integrate them into our final version. Check out the intended look below.
To get this output, first, include the Tailwind CSS CDN in your HTML file:
<link href="https://cdn.jsdelivr.net/npm/[email protected]/dist/tailwind.min.css" rel="stylesheet">Then, update your form to use Tailwind CSS classes for styling:
<form class="bg-white p-6 shadow-md rounded-lg" data-sheet-best="YOUR_SHEET_BEST_CONNECTION_ID">
  <label class="block mb-2">Name:
    <input type="text" name="Name" class="border p-2 rounded w-full" required>
  </label>
  <label class="block mb-2">Topic:
    <input type="text" name="Topic" class="border p-2 rounded w-full" required>
  </label>
  <label class="block mb-2">Feedback:
    <textarea name="Feedback" class="border p-2 rounded w-full" required></textarea>
  </label>
  <button type="submit" class="bg-green-600 text-white p-2 rounded mt-2">Submit Feedback</button>
</form>
You can also update the submission feedback to show a formatted div when the form is submitted:
<script>
  document.addEventListener('DOMContentLoaded', () => {
    document.querySelectorAll('form[data-sheet-best]').forEach(form => {
      form.addEventListener('submit-finished', (event) => {
        const successMessage = document.createElement('div');
        successMessage.className = 'bg-green-100 border border-green-400 text-green-700 px-4 py-3 rounded relative';
        successMessage.innerHTML = 'Feedback submitted successfully!';
        form.parentNode.insertBefore(successMessage, form);
        form.reset();
      });
    });
  });
</script>
This way, users will see a styled success message after submitting the form.
Now, when users submit their feedback, it will automatically appear in your Google Sheet!
Conclusion
Using Sheet Best, you can quickly set up a form that connects directly to Google Sheets without writing complex backend code. This is a great way to collect feedback, store customer responses, or track any data effortlessly.
The great part about using the Sheet Best Templates is that they’re really simple to integrate, and you can grab fully working code snippets directly off of GitHub. And best of all, the JavaScript library is free to use, open source, and also available on GitHub.
Try it out and let us know how it works for you! 🚀